
Lesson 07: Object Detection with YOLOX
 Viet-Anh Nguyen
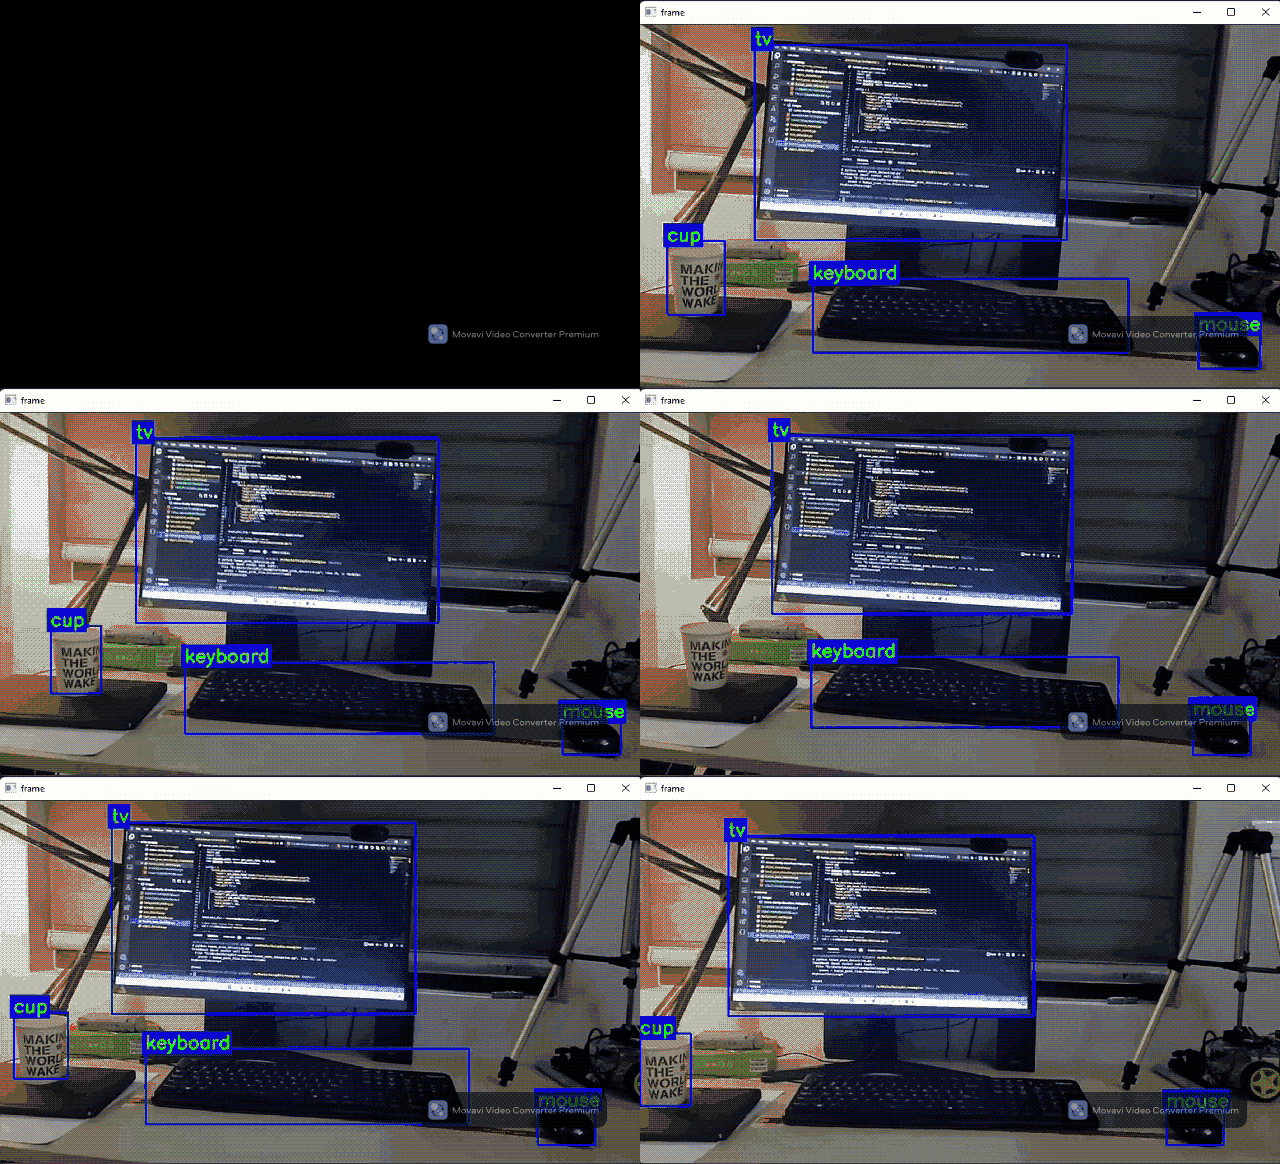
ObjectDetectorFlow wraps a YOLOX model trained on the COCO dataset (80 classes: person, car, dog, chair, laptop, etc.). YOLOX is an anchor-free, high-accuracy single-stage detector from Megvii. DaisyKit bundles yolox-tiny by default — a good balance of speed and accuracy for real-time use.
Configuration
import json
from daisykit.utils import get_asset_file

COCO_CLASSES = [
    "person", "bicycle", "car", "motorcycle", "airplane", "bus", "train",
    "truck", "boat", "traffic light", "fire hydrant", "stop sign",
    "parking meter", "bench", "bird", "cat", "dog", "horse", "sheep", "cow",
    "elephant", "bear", "zebra", "giraffe", "backpack", "umbrella", "handbag",
    "tie", "suitcase", "frisbee", "skis", "snowboard", "sports ball", "kite",
    "baseball bat", "baseball glove", "skateboard", "surfboard", "tennis racket",
    "bottle", "wine glass", "cup", "fork", "knife", "spoon", "bowl", "banana",
    "apple", "sandwich", "orange", "broccoli", "carrot", "hot dog", "pizza",
    "donut", "cake", "chair", "couch", "potted plant", "bed", "dining table",
    "toilet", "tv", "laptop", "mouse", "remote", "keyboard", "cell phone",
    "microwave", "oven", "toaster", "sink", "refrigerator", "book", "clock",
    "vase", "scissors", "teddy bear", "hair drier", "toothbrush",
]

config = {
    "object_detection_model": {
        "model": get_asset_file("models/object_detection/yolox-tiny.param"),
        "weights": get_asset_file("models/object_detection/yolox-tiny.bin"),
        "input_width": 416,
        "input_height": 416,
        "score_threshold": 0.5,   # minimum confidence
        "iou_threshold": 0.8,     # NMS overlap threshold
        "use_gpu": False,
        "class_names": COCO_CLASSES,
    },
}
Real-Time Webcam Demo
import cv2
import json
from daisykit.utils import get_asset_file, to_py_type
from daisykit import ObjectDetectorFlow

config = { ... }  # as above

flow = ObjectDetectorFlow(json.dumps(config))
cap = cv2.VideoCapture(0)

while True:
    ret, frame = cap.read()
    if not ret:
        break

    rgb = cv2.cvtColor(frame, cv2.COLOR_BGR2RGB)

    objects = flow.Process(rgb)
    flow.DrawResult(rgb, objects)

    display = cv2.cvtColor(rgb, cv2.COLOR_RGB2BGR)
    cv2.imshow("Object Detection (YOLOX)", display)

    if cv2.waitKey(1) & 0xFF == ord("q"):
        break

cap.release()
cv2.destroyAllWindows()
Reading Detection Results
rgb = cv2.cvtColor(frame, cv2.COLOR_BGR2RGB)
objects = flow.Process(rgb)
objects_py = to_py_type(objects)

for obj in objects_py:
    cls_id   = obj["class_id"]
    cls_name = COCO_CLASSES[cls_id] if cls_id < len(COCO_CLASSES) else "unknown"
    conf     = obj["confidence"]
    x, y, w, h = obj["x"], obj["y"], obj["w"], obj["h"]
    print(f"  {cls_name:15s}  conf={conf:.2f}  bbox=({x},{y},{w},{h})")
Filtering Specific Classes
You can filter detection results to only act on certain classes:
WANTED = {"person", "car", "bus", "bicycle"}

objects_py = to_py_type(objects)
people_and_vehicles = [
    obj for obj in objects_py
    if COCO_CLASSES[obj["class_id"]] in WANTED
]

print(f"People and vehicles: {len(people_and_vehicles)}")
for obj in people_and_vehicles:
    print(f"  {COCO_CLASSES[obj['class_id']]}  conf={obj['confidence']:.2f}")
Running on a Static Image
import cv2
import json
import urllib.request
from daisykit.utils import get_asset_file, to_py_type
from daisykit import ObjectDetectorFlow

urllib.request.urlretrieve("https://ultralytics.com/images/bus.jpg", "bus.jpg")

config = { ... }
flow = ObjectDetectorFlow(json.dumps(config))

img = cv2.imread("bus.jpg")
rgb = cv2.cvtColor(img, cv2.COLOR_BGR2RGB)

objects = flow.Process(rgb)
print(f"Detected {len(to_py_type(objects))} objects")

flow.DrawResult(rgb, objects)
cv2.imwrite("detection_result.jpg", cv2.cvtColor(rgb, cv2.COLOR_RGB2BGR))
# Expected: bus.jpg with bounding boxes around ~6 persons, 1 bus, 2 cars
Using Custom YOLOX Models
If you've trained a YOLOX model on your own dataset and converted it to NCNN format, plug it in directly:
config = {
    "object_detection_model": {
        "model":   "path/to/your_model.param",
        "weights": "path/to/your_model.bin",
        "input_width": 640,
        "input_height": 640,
        "score_threshold": 0.5,
        "iou_threshold": 0.65,
        "use_gpu": False,
        "class_names": ["your_class_1", "your_class_2", "your_class_3"],
    },
}
See Lesson 10 for details on converting custom models to NCNN format.
Speed vs Accuracy Trade-off
| Model Variant | Input | COCO mAP | Speed (CPU i7) |
|---|---|---|---|
| yolox-nano | 416×416 | 25.8 | ~30 FPS |
| yolox-tiny | 416×416 | 32.8 | ~20 FPS |
| yolox-s | 640×640 | 40.5 | ~8 FPS |
DaisyKit bundles yolox-tiny for a good default. Swap to yolox-nano for embedded systems.
Applications
- Retail analytics — count products on shelves, detect misplaced items
- Security cameras — alert when a person or vehicle enters a zone
- Robotics — detect and navigate around obstacles
- Inventory systems — count and classify items in images
Conclusion
ObjectDetectorFlow gives you 80-class COCO detection in one Process() call. Swap the model file and class list to run any custom YOLOX model. Next: scanning barcodes and QR codes without a neural network.