Lesson 02: Installation & First Labels
 Viet-Anh Nguyen
Three installation paths. Pick the one that matches your setup.
Method 1: pip (Recommended)
Requires Python 3.10 or later. Python 3.12 is recommended.
# Create an isolated environment
conda create -n anylabeling python=3.12
conda activate anylabeling

# CPU version
pip install anylabeling

# Launch
anylabeling
For GPU-accelerated inference (NVIDIA GPUs with CUDA):
pip install anylabeling-gpu
anylabeling
The GPU version uses ONNX Runtime with CUDA, which makes SAM and YOLO inference significantly faster — especially for large images or ViT-H models.
macOS note: If you hit PyQt issues on macOS, install PyQt6 via conda first:
conda install pyqt6beforepip install anylabeling.
Method 2: Pre-Built Binaries
Download the latest release from GitHub Releases. Releases tagged with -GPU include CUDA support.
- Windows: Download the
.exe, double-click to run. - macOS: Download the folder-mode build (not the single-file
.app). - Linux: Download the AppImage or extract the tarball.
No Python installation required. This is the fastest path if you just want to label images without touching a terminal.
Method 3: From Source
For development or bleeding-edge features:
git clone https://github.com/vietanhdev/anylabeling
cd anylabeling
pip install -e .
python anylabeling/app.py
The Interface at a Glance
When you launch AnyLabeling, you see four main areas:
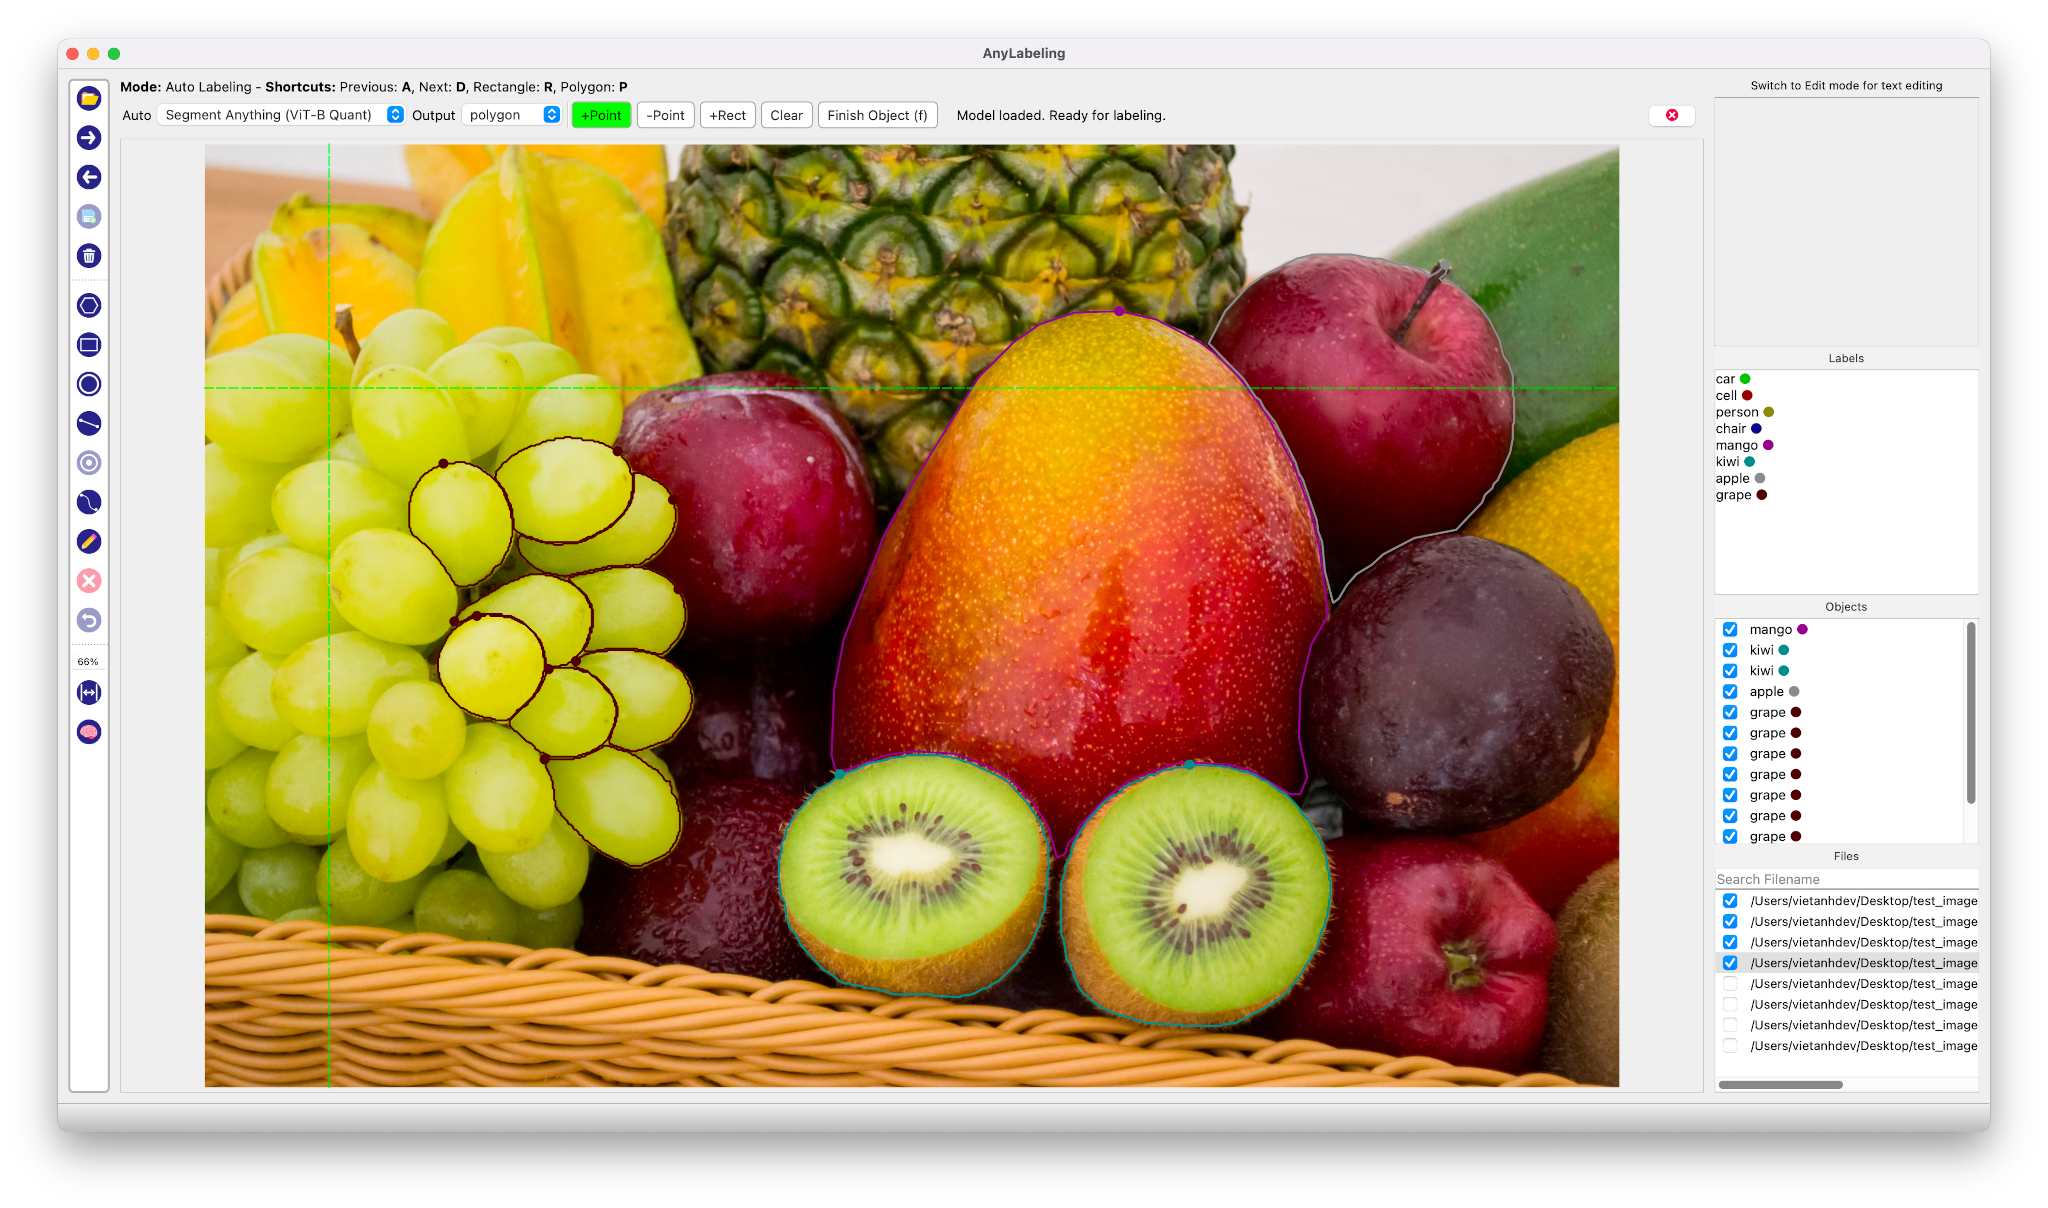
Tool Bar (left) — annotation tools (rectangle, polygon, point, etc.) and the brain icon for AI auto-labeling.
Canvas (center) — the image you are annotating. Zoom with Ctrl + scroll wheel. Pan by holding Ctrl and dragging.
Label List (top right) — all labels/annotations on the current image. Click to select, double-click to rename.
File List (bottom right) — all images in the current directory. Click to navigate. Current image is highlighted.
Loading Images
Three ways to load images:
| Action | Shortcut |
|---|---|
| Open directory | Ctrl + U |
| Open single file | Ctrl + I |
| Drag and drop | Drag a folder onto the window |
Ctrl + U is the one you will use most. It opens every image in a directory and lists them in the File List panel.
Your First Annotation
Let's draw a bounding box:
- Open a directory with images (
Ctrl + U). - Select Rectangle from the toolbar, or press
R. - Click and drag on the canvas to draw a rectangle around an object.
- A dialog appears — type the label name (e.g.,
car) and press Enter. - The annotation appears in the Label List. The label file is auto-saved.
That is it. The annotation is saved as a .json file alongside your image, in LabelMe-compatible format. Every time you draw, edit, or delete a shape, the file updates automatically.
Essential Keyboard Shortcuts
These shortcuts will save you hours over the course of a real annotation session:
| Shortcut | Action |
|---|---|
R | Rectangle tool |
P | Polygon tool |
Ctrl + U | Open image directory |
D | Next image |
A | Previous image |
Ctrl + S | Save current annotations |
Ctrl + Z | Undo last action |
Ctrl + Shift + Z | Redo |
Delete / Backspace | Delete selected shape |
Ctrl + + / Ctrl + - | Zoom in / out |
Ctrl + 0 | Fit image to window |
Ctrl + A | Toggle auto-labeling mode |
Tip: Enable View > Keep Previous Zoom Ratio to maintain your zoom level when switching between images. This is essential when annotating small objects across a dataset.
The Label File Format
AnyLabeling saves annotations in a JSON format compatible with Labelme:
{
  "version": "0.3.3",
  "flags": {},
  "shapes": [
    {
      "label": "car",
      "points": [
        [100, 150],
        [400, 350]
      ],
      "group_id": null,
      "shape_type": "rectangle",
      "flags": {}
    }
  ],
  "imagePath": "image_001.jpg",
  "imageHeight": 720,
  "imageWidth": 1280
}
Each image gets its own .json file. This is the internal format — you will export to COCO, YOLO, or VOC for training in Lesson 07.
Adjusting Display Settings
Two settings that matter for annotation quality:
Brightness and contrast — View > Brightness Control and View > Contrast Control. Useful for dark or overexposed images. Enable Keep Current Brightness and Keep Current Contrast to apply adjustments across all images in the session.
Cross-line cursor — helps with precise alignment. Toggle it from the View menu.
Verify Your Installation
Run through this checklist:
- AnyLabeling launches without errors.
- You can open a directory of images with
Ctrl + U. - You can draw a rectangle and assign a label.
- The
.jsonfile appears next to your image. - You can navigate between images with
AandD.
If everything works, you are ready. In the next lesson, we go deep on every annotation type AnyLabeling supports — polygons, points, lines, circles, and rotated bounding boxes — with the shortcuts and techniques that make manual annotation fast.